
티스토리 뷰
detectron 샘플 예제를 응용하기 위해 직접 모델을 만들어 보기로 한다.
안경을 구분해 내는 모델을 만들어 보도록 한다.
훈련용 이미지에 labeling 을 해줘야 하는데, 여러가지 툴 중 Polygon 형태의 labeling이 가능한 labelme 라는 툴을 사용하기로 했다.
https://github.com/wkentaro/labelme#macos
GitHub - wkentaro/labelme: Image Polygonal Annotation with Python (polygon, rectangle, circle, line, point and image-level flag
Image Polygonal Annotation with Python (polygon, rectangle, circle, line, point and image-level flag annotation). - GitHub - wkentaro/labelme: Image Polygonal Annotation with Python (polygon, recta...
github.com
mac 환경에서의 설치법은 두줄이면 된다.
추가로 detectron에서 쓰일 coco 데이터 포맷으로 변환하기 위해 labelme2coco 도 같이 설치 해준다.
brew install pyqt
pip install labelme
pip install labelme2coco
pyqt 가 설치하는데 의존성 라이브러리들이 많아서 시간이 좀 걸린다.
M1 맥에서는 기본 파이썬으로 설치가 안되어 python@3.7 을 설치하고 다시 설치를 했다.
https://diewland.medium.com/how-to-install-python-3-7-on-macbook-m1-87c5b0fcb3b5
How to install python 3.7 on macbook M1 ?
This is what you get when you try to install python 3.7 from brew on M1.
diewland.medium.com
그리고 구글에서 glasses , faces 이미지를 검색해 여러 이미지를 다운받아서 train 용 validation 용 각각 구분하여 이미지를 수집하고
해당폴더에서 labelme 명령어를 입력하면 프로그램이 실행된다.

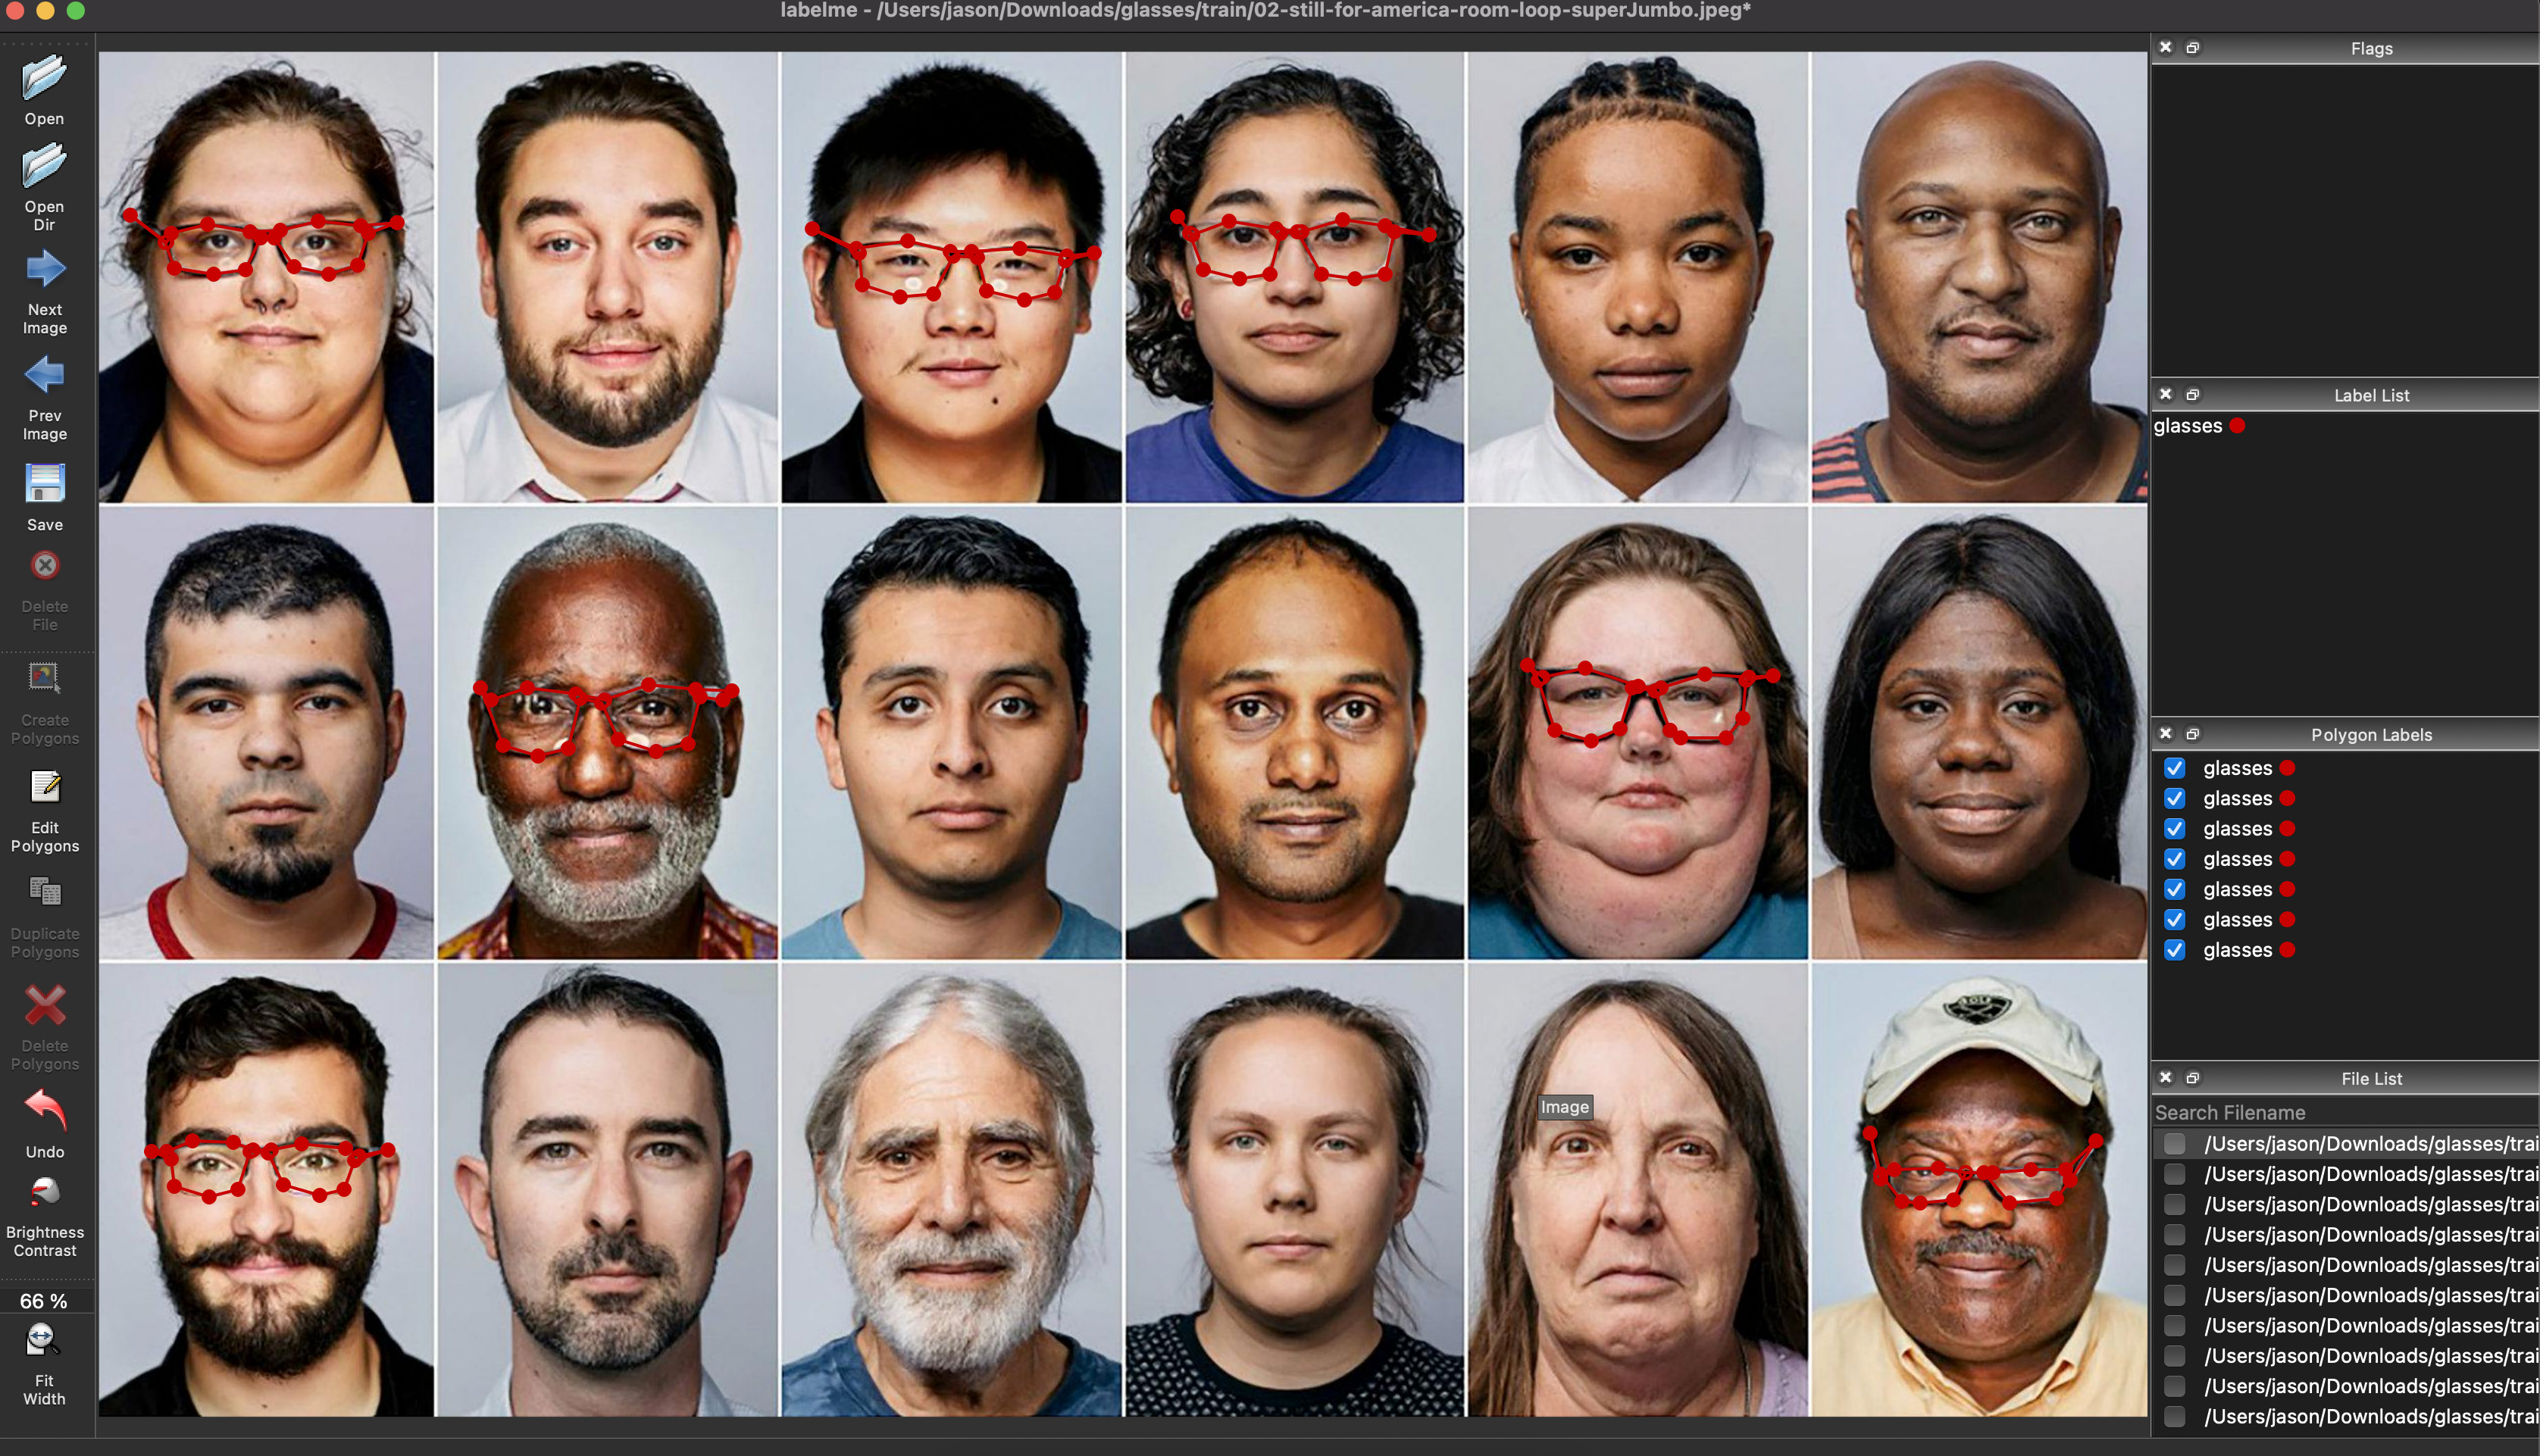
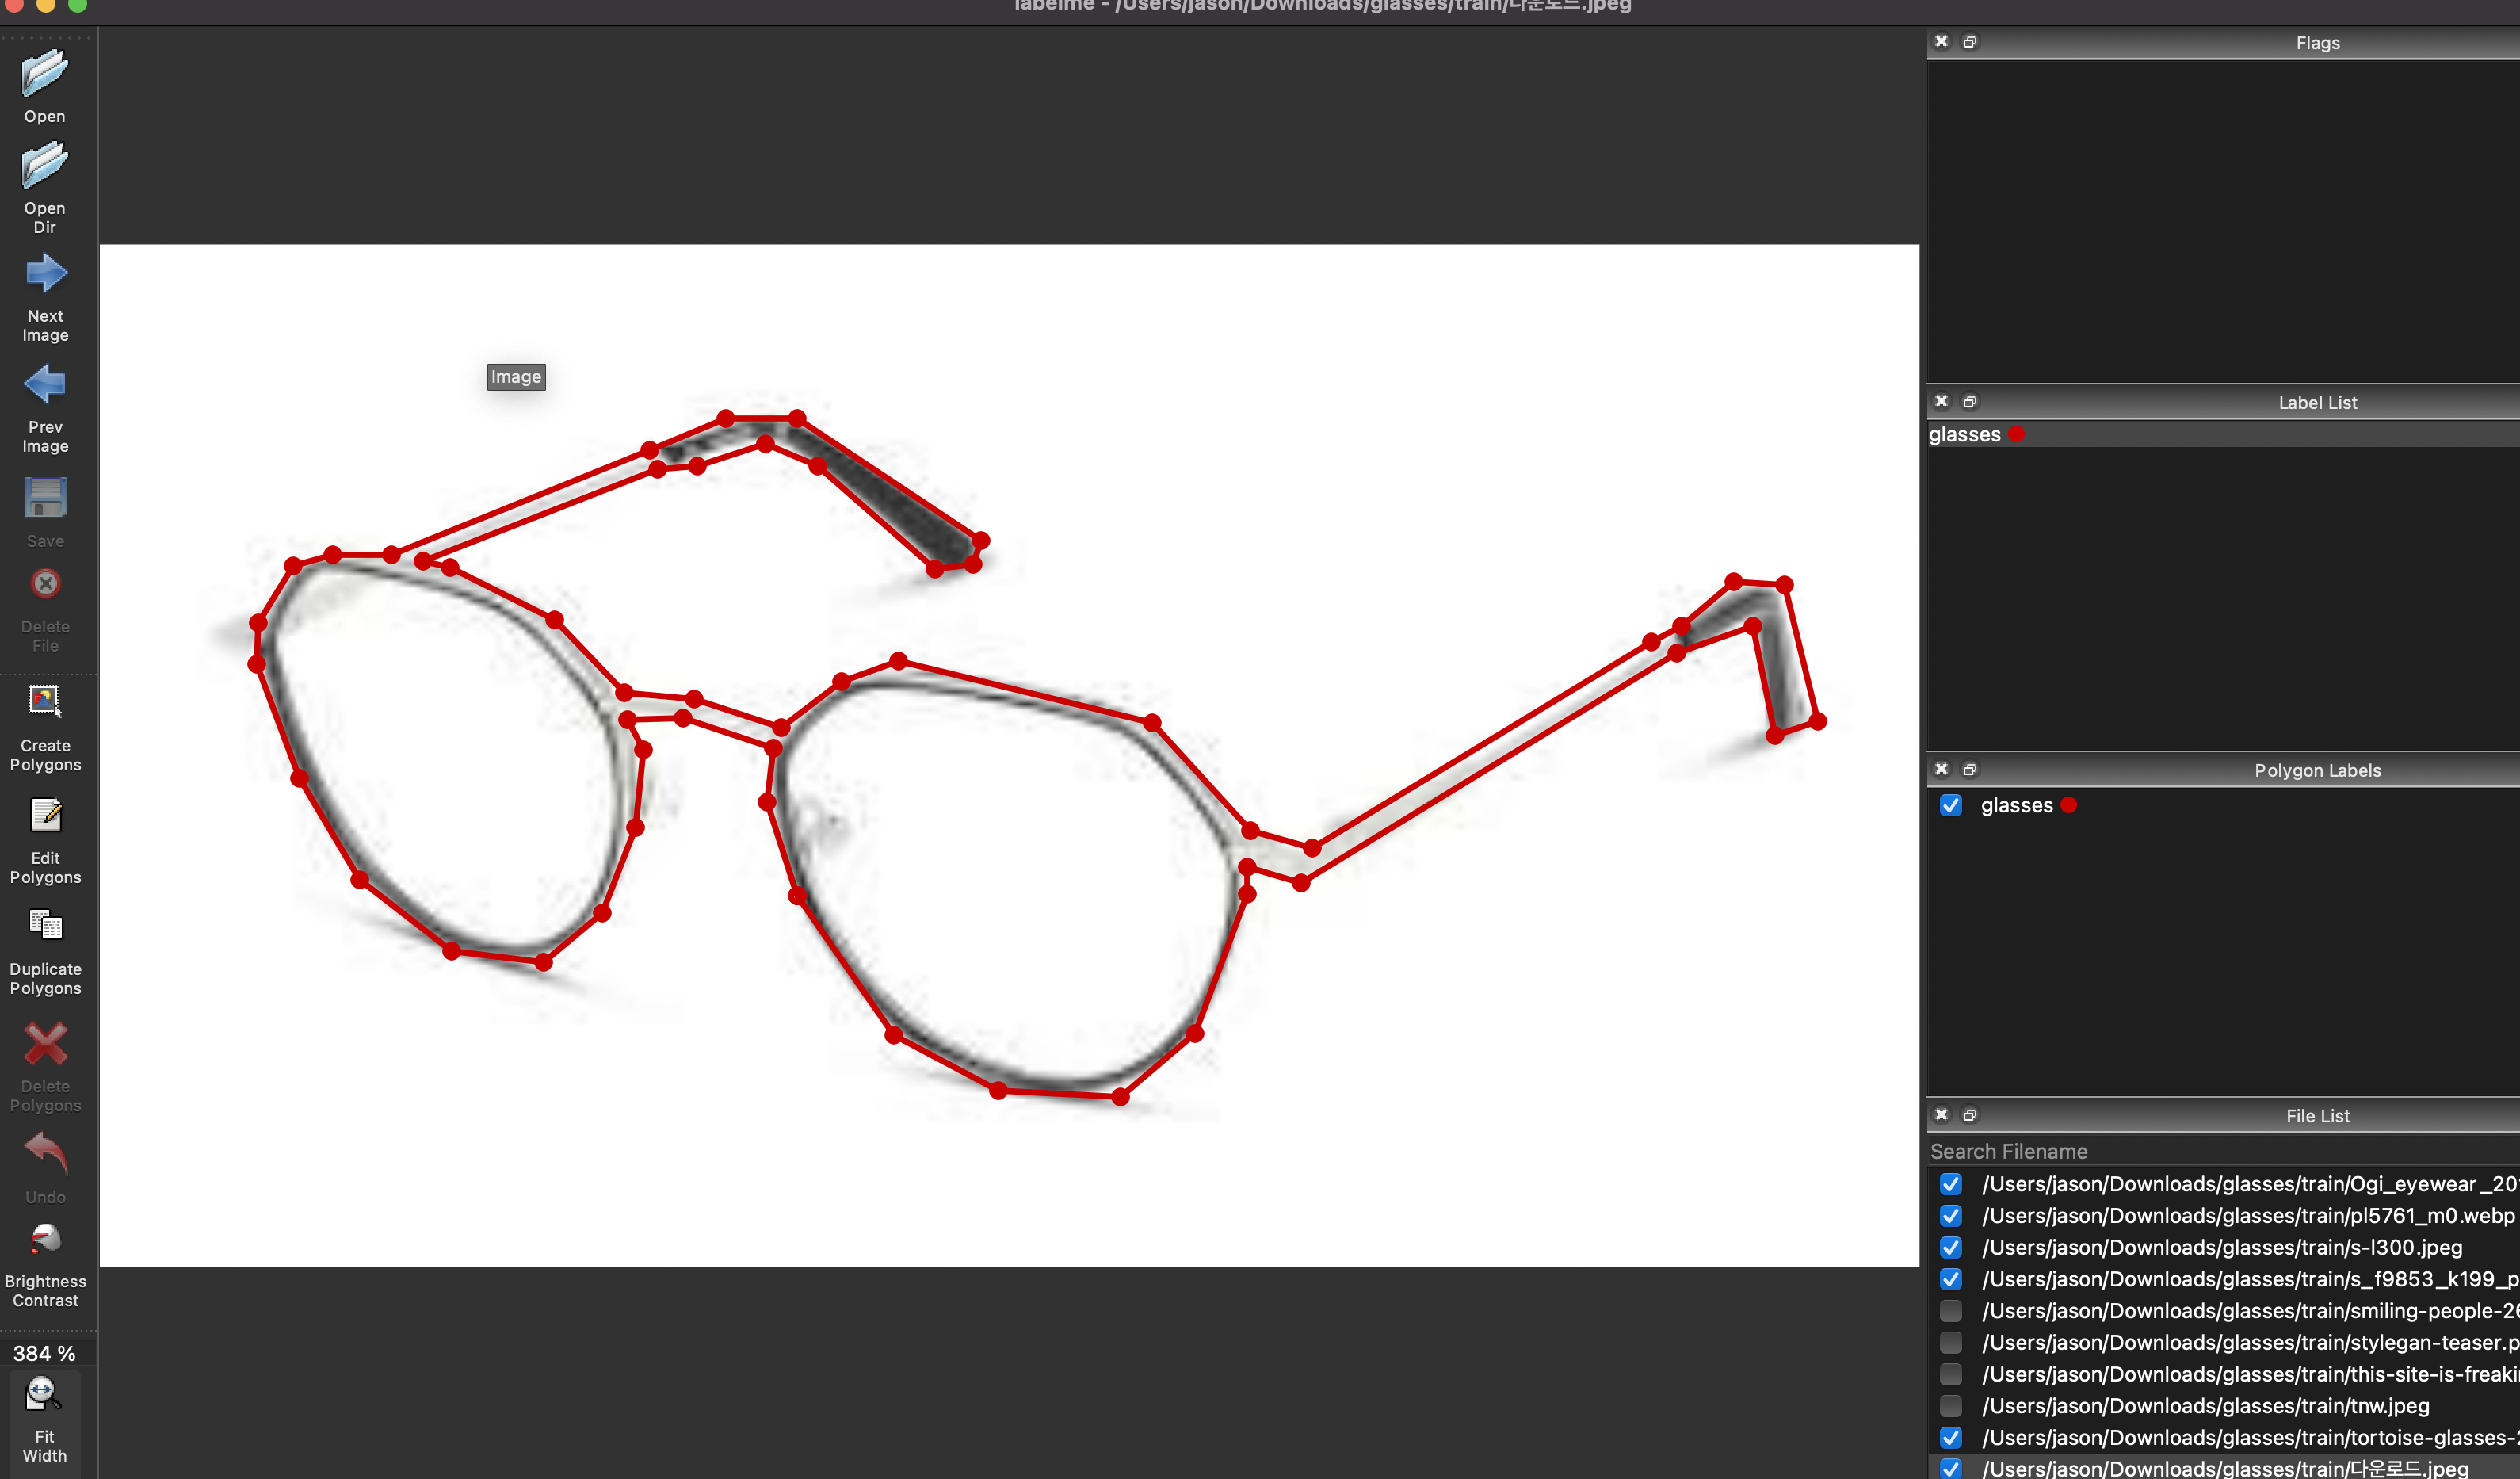
레이블링을 열심히 해주고 나면 각 사진파일별로 json 파일이 생성이 된다.
이제 이 분할된 json 파일들을 하나로 묶어서 COCO 데이터 포맷으로 변환해줘야 한다.
https://github.com/fcakyon/labelme2coco
GitHub - fcakyon/labelme2coco: Make your own dataset for object detection and transform the format to coco json format
Make your own dataset for object detection and transform the format to coco json format - GitHub - fcakyon/labelme2coco: Make your own dataset for object detection and transform the format to coco ...
github.com
이 라이브러리를 통해 쉽게 변환이 가능하다.
설치는 해두었으니 convert_coco.py 파일을 만들고 아래의 코드를 넣고 실행하면 result_coco.json 파일이 만들어진다.
import labelme2coco

labelme_folder = "./train"
save_json_path = "./result_coco.json"

labelme2coco.convert(labelme_folder, save_json_path)
이제 샘플에서와 같이 트레이닝을 해볼 차례이다.
샘플과 다른점은 dataset 을 불러오는 방식이 MetadataCatalog, DatasetCatalog register 형식이 아니라
바로 coco json data 를 regist 하는 방식이다.
코드는 아래와 같다.
from detectron2.utils.logger import setup_logger
# from detectron2.utils.visualizer import Visualizer

setup_logger()

# import some common libraries
import numpy as np
import os, json, cv2, random

from detectron2.data import MetadataCatalog, DatasetCatalog
from detectron2.data.datasets import register_coco_instances


if __name__ == '__main__':

    # Register coco data set
    json_file_path = "./result_coco.json"
    dataset_dir = "./"
    register_coco_instances("glasses_dataset", {}, json_file_path, dataset_dir)

    from detectron2.engine import DefaultTrainer
    from detectron2 import model_zoo
    from detectron2.config import get_cfg
    cfg = get_cfg()

    # without cuda
    cfg.MODEL.DEVICE = "cpu"

    cfg.merge_from_file(model_zoo.get_config_file("COCO-InstanceSegmentation/mask_rcnn_R_50_FPN_3x.yaml"))
    cfg.DATASETS.TRAIN = ("glasses_dataset",)
    cfg.DATASETS.TEST = ()
    cfg.DATALOADER.NUM_WORKERS = 2
    cfg.MODEL.WEIGHTS = model_zoo.get_checkpoint_url("COCO-InstanceSegmentation/mask_rcnn_R_50_FPN_3x.yaml")  # Let training initialize from model zoo
    cfg.SOLVER.IMS_PER_BATCH = 2
    cfg.SOLVER.BASE_LR = 0.00025  # pick a good LR
    cfg.SOLVER.MAX_ITER = 300    # 300 iterations seems good enough for this toy dataset; you will need to train longer for a practical dataset
    cfg.SOLVER.STEPS = []        # do not decay learning rate
    cfg.MODEL.ROI_HEADS.BATCH_SIZE_PER_IMAGE = 128   # faster, and good enough for this toy dataset (default: 512)
    cfg.MODEL.ROI_HEADS.NUM_CLASSES = 1  # only has one class (ballon). (see https://detectron2.readthedocs.io/tutorials/datasets.html#update-the-config-for-new-datasets)
    # NOTE: this config means the number of classes, but a few popular unofficial tutorials incorrect uses num_classes+1 here.

    os.makedirs(cfg.OUTPUT_DIR, exist_ok=True)
    trainer = DefaultTrainer(cfg)
    trainer.resume_or_load(resume=False)
    trainer.train()
샘플 소스 보다 코드가 더 간결해졌다.
데이터셋 visualization 으로 확인을 하고싶다면 아래와 같은 코드를 register_coco_instance 코드 다음에 추가 해서 샘플처럼 확인 하면 된다.
from pycocotools.coco import COCO
from skimage import io
from matplotlib import pyplot as plt

# coco data visualization of segmentation mask
coco = COCO(json_file_path)
catIds = coco.getCatIds(catNms=['glasses'])
imgIds = coco.getImgIds(catIds=catIds)

# 5장의 이미지를 랜덤하게 가져와서 확인하는 부분
for d in random.sample(imgIds, 5):
    img = coco.loadImgs(imgIds[d])[0]
    file_name = io.imread(img['file_name'])
    plt.axis('off')
    plt.imshow(file_name) #Draw the image and show it to plt.show()
    annIds = coco.getAnnIds(imgIds=img['id'], catIds=catIds, iscrowd=None)
    anns = coco.loadAnns(annIds)
    coco.showAnns(anns)
    plt.show()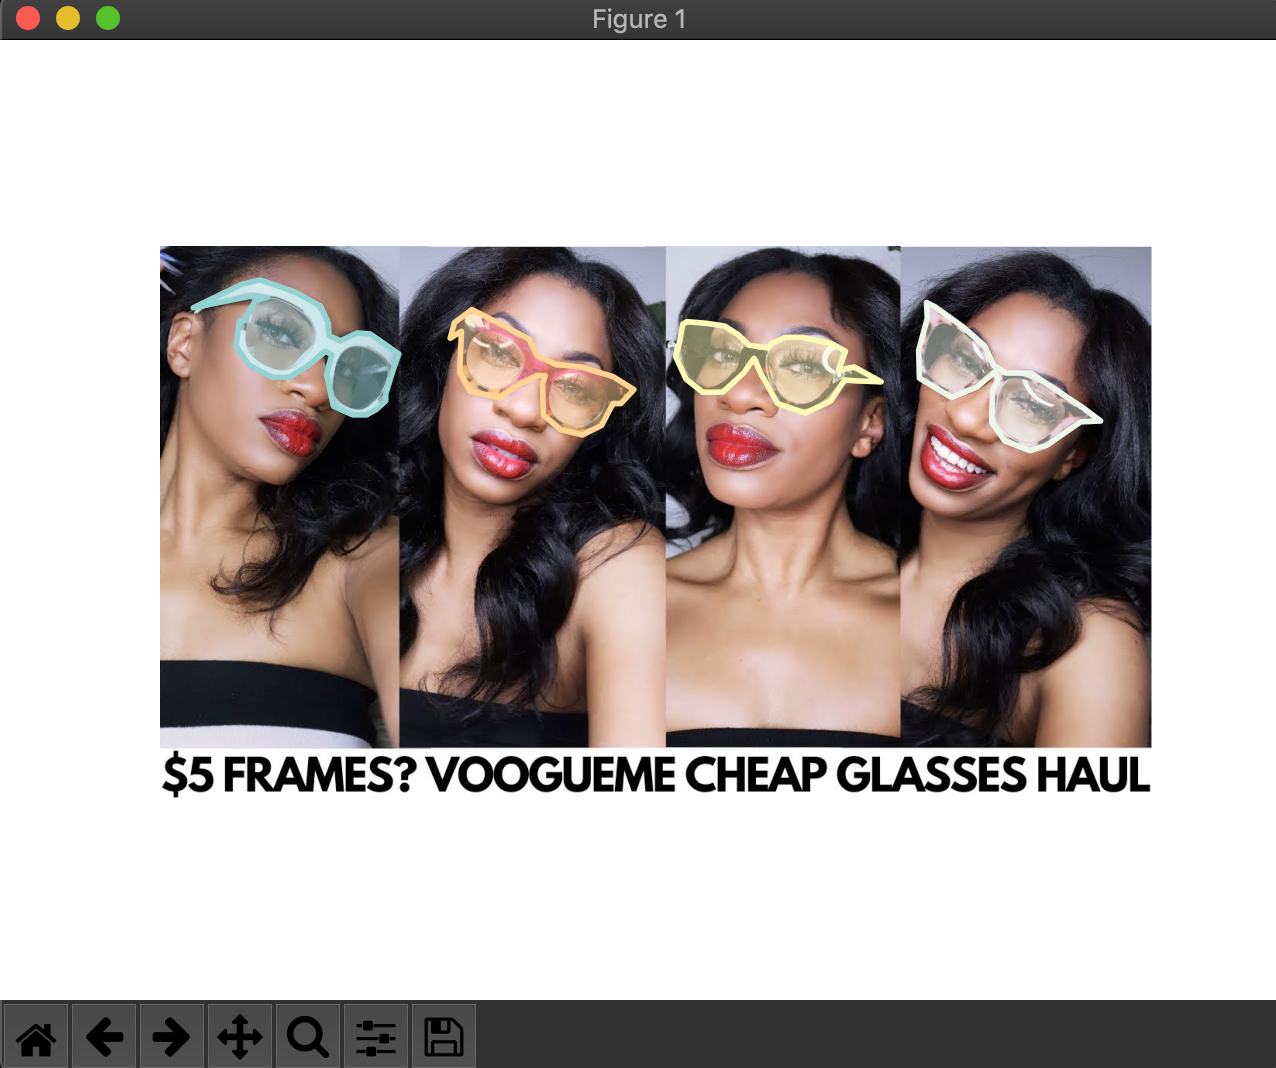
여기까지 Training 과정을 마치고 다음은 Validation 을 진행 해보도록 한다.
다음편에서 계속
'Develope > Python' 카테고리의 다른 글
| Ubuntu20.04 - CUDA, tensorflow 설치하기 (0) | 2021.08.27 |
|---|---|
| Detectron - 응용편2 #validation (0) | 2021.08.04 |
| Detectron2 - Example2 따라하기 (0) | 2021.08.02 |
| Detectron2 - Example 따라하기 1 (0) | 2021.07.27 |
| Facebook Detectron2 - 설치 (0) | 2021.07.27 |
- Total
- Today
- Yesterday
- php
- object-C
- Android
- Deeplearning
- 강좌
- diy
- OpenCV
- ubuntu
- 리눅스
- 스위프트
- 공기청정기
- 라즈베리파이
- xcode
- 서버
- 딥러닝
- 인공지능
- 파이썬
- 아두이노
- 미세먼지
- 머신러닝
- 사물인터넷
- ios
- IOT
- mysql
- 캠핑
- swift
- 우분투
- Python
- 엘라스틱서치
- 아이폰
| 일 | 월 | 화 | 수 | 목 | 금 | 토 |
|---|---|---|---|---|---|---|
| 1 | ||||||
| 2 | 3 | 4 | 5 | 6 | 7 | 8 |
| 9 | 10 | 11 | 12 | 13 | 14 | 15 |
| 16 | 17 | 18 | 19 | 20 | 21 | 22 |
| 23 | 24 | 25 | 26 | 27 | 28 | 29 |
| 30 |